The Blue Field is a nod to Pokémon Blue. Like the Red Field, it is played across two screens, but its targets are different: a moving arrow, the Dash arrow, decides where the ball goes, and the two main modes are started by hitting two Pokémon that flank this arrow. It has 12 locations and 33 exclusive Pokémon, evolutions included. This page describes each element; the detailed mechanics are covered on the Catch ‘Em, Evolution and map and locations pages.
The upper screen
The three Shellder
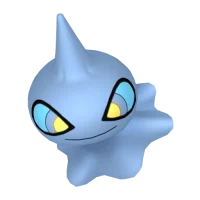
In the center, three Shellder act as bumpers. A hit makes them close for a moment and earns 5,000 points. Their role is identical to that of the Voltorb on the Red Field: six hits reveal the silhouette during Catch ‘Em Mode, and the group is among the targets of Evolution Mode. During these modes, each hit adds 100,000 points to the catch jackpot or 150,000 to the evolution jackpot.
The Dash arrow
Between Slowpoke and Cloyster sits the Dash arrow, or Dash plate. It points in turn up, down, left and right, and a ball that touches it goes off in the direction indicated at the moment of contact. The game makes it change orientation regularly, with a few rules that help the player:
- when the ball arrives from below, it most often points up, toward the Shellder and the Ball Upgrade lanes;
- when the ball is above it, in the Shellder area, it may turn down to bring the ball back to the lower screen, or to one side to reach Slowpoke or Cloyster;
- when at least two GET arrows are lit, it often points right, toward Cloyster; when all three EVO arrows are lit, often left, toward Slowpoke;
- during travel, it often points to the side that opens the bonus hole;
- during a Catch ‘Em or Evolution Mode, it alternates randomly between left and right.
Slowpoke and Cloyster
Slowpoke is to the left of the Dash arrow, Cloyster to the right. Slowpoke swallows the ball and starts Evolution Mode when all three EVO arrows are lit; Cloyster closes its shell around it and starts Catch ‘Em Mode when at least two GET arrows are lit. Each entry earns 100,000 points and counts toward the Extra Ball: every 25 combined entries into one or the other, a ball is awarded. These two Pokémon are also used to open the bonus hole when travel has been started from their side. On the Red Field, their equivalents are the Ditto hole and Bellsprout.
The three Ball Upgrade lanes
Unlike the Red Field, these lanes are always accessible: no target closes them off. Each pass of the ball over an indicator lights it if it was off and turns it off if it was lit, which forces you to control your shots. When all three are lit, the ball moves up to the next level. See Ball Upgrade.
The two loops and the spinner
The Blue Field has two passages: the left loop, which carries the three EVO arrows, and the right loop, which carries the three GET arrows and the spinner. As on the Red Field, you only need to reach the yellow rectangle at the top of the loop to light the next arrow. Each turn of the spinner earns 100 points and charges the Thunder gauge.
The lower screen
Poliwag and Psyduck
Poliwag occupies the left side of the screen, Psyduck the right side. Poliwag’s red button and Psyduck’s head each earn 5,000 points. Each Pokémon has a counter that climbs to three: three hits on the same side trigger Travel Mode. The counter drops back by one after about eight seconds without a new hit, and resets when the ball is lost. Getting a three counts toward an Extra Ball every ten times and for 50,000 points each in the end-of-ball bonus.
The bonus hole, the panel and the counter
As on the Red Field, the bonus hole in the center opens when the four CAVE indicators light up, when a Bonus stage is available or during travel. The Pokémon panel shows the current location, the silhouette to catch or the order to go to the bonus. The three-Poké Ball counter tracks access to the Bonus stages.
The Bonus Multiplier, Pikachu and CAVE
Two buttons and two digits, tens on the left and units on the right, raise the Bonus Multiplier. Pikachu guards the two outlanes: flipper hits move him, and he only saves the ball if the Thunder gauge is full. The four CAVE indicators open the Slot Machine. These elements are shared by both fields.
The nine arrows and the Dash arrow
| Arrow | Location | Role |
|---|---|---|
| 3 EVO arrows | Bottom of the left loop | With three arrows lit, the Dash arrow can send the ball into Slowpoke |
| 3 GET arrows | Bottom of the right loop | Two arrows are enough to start Catch ‘Em Mode; three arrows open the rare Pokémon draw |
| Slowpoke arrow | Near the EVO arrows | Lights up when a shot on Slowpoke is useful |
| Cloyster arrow | Near the GET arrows | Lights up when a shot on Cloyster is useful |
| Bonus hole indicator | In the center | Shows that the hole is open |
As on the Red Field, the starting state is two GET arrows lit and no EVO arrows: Catch ‘Em Mode is available right away. The route is different, though: you have to let the Dash arrow steer the ball toward Cloyster, instead of aiming at a fixed target.
Evolution item targets
During Evolution Mode, seven elements can hide an item: the Shellder group, Poliwag, Psyduck, the two Bonus Multiplier counters, Slowpoke and Cloyster. Four to seven targets are candidates depending on the Pokémon, and only three contain the item.
Reading the field
The Blue Field demands patience: the Dash arrow is capricious, and it’s best to prepare the EVO and GET arrows well in advance so that, when the ball reaches the Shellder area, the arrow often turns the right way. The advantage is that the Ball Upgrade lanes stay open, which makes it easier to move up from the Poké Ball to the Master Ball. It is also the field with the most exclusive rare Pokémon: Eevee, Porygon, Aerodactyl and Lapras exist only on it.